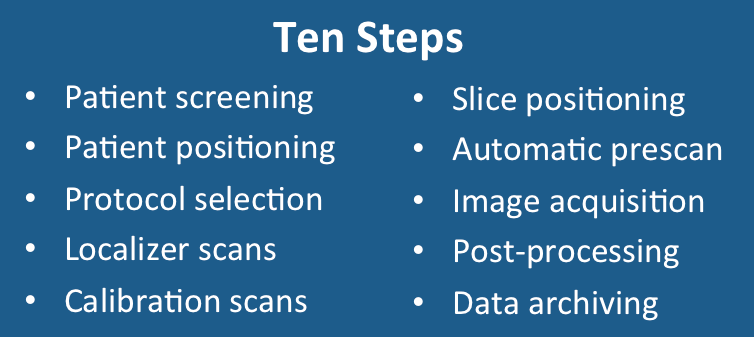
1. Patient preparation and screening. The MR scanning sequence begins by screening the patient for metallic foreign bodies and devices such as pacemakers that may represent a contraindication to imaging. The patient's important health conditions, including allergies, are also reviewed. Informed consent is obtained for the procedure including the administration of gadolinium, if ordered. The technologist fully explains what the scanning procedure entails and answers questions. Thus prepared for the study, the patient is led into the scanner room for the scan itself.

2. Patient positioning. The patient is placed on the table, usually in the supine position. Receiver imaging coils are arranged around the body part of interest (head, chest, knee, etc.) If EKG or respiratory gating is required, then these devices are attached at this time. A key anatomic structure such as the bridge of the nose or umbilicus is identified as a landmark using laser guidance, and this is correlated with table position by pressing a button on the gantry.
|
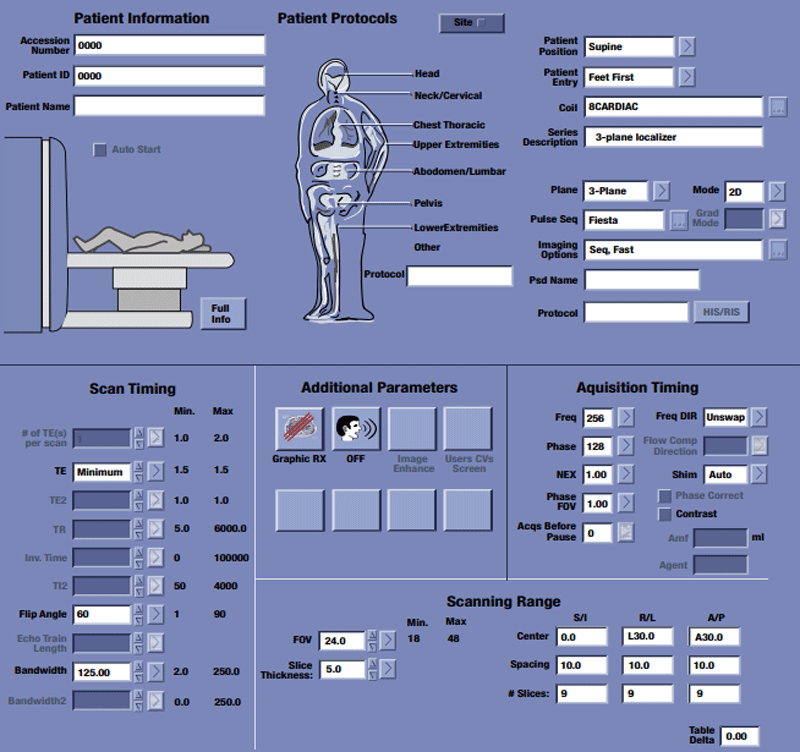
3. Protocol selection. Most MR sites have developed an extensive list of imaging protocols for various diseases and clinical scenarios. Each protocol typically contains a half dozen or so pulse sequences oriented in different planes and with different parameter weightings. For example, for cranial imaging there might be protocols called "Routine Adult Brain", "Routine Infant Brain", "Epilepsy Brain", "MR Angiogram Circle of Willis", and a dozen others. The technologist simply calls up the desired protocol from the library to begin scanning. Alternatively, generic sequences are also present in the scanner library that can be modified for specialized views or techniques.
|
|
4. Localizer scans. A set of three-plane, low-resolution, large field-of view localizers are first obtained, equivalent to "scout views" in CT. These localizer images will be used for plotting slices in step 6.
5. Calibration scans for parallel imaging. If parallel imaging is to be performed, a coil sensitivity calibration scan may also be required. This blurry image is not used for diagnosis but is often displayed as a separate series.
|
6. Position slices and saturation bands. At this point the exact positions and angulation of slices will be graphically specified. Protocol parameters such as field-of-view, directions of phase- and frequency-encoding, slice thickness, can be modified at this point so they are optimized for the particular patient's anatomy. If saturation bands are required, these are also graphically positioned at this time. Once the slices and bands have been specified and parameters tweaked, the "Scan" button is pushed and the image acquisition process finally begins.
7. Automatic prescan. Scanning begins, but not immediately. The scanner first goes through a brief (10-20 sec) calibration procedure known as prescan. Prescan consists of 6 steps: quick higher-order shimming, coil tuning/matching, center frequency calibration, transmitter gain adjustment, receiver gain adjustment, and dummy cycle stimulation. Although a fully automated process, manual adjustments are also sometimes needed. These prescan steps are described more completely in subsequent Q&A's.
8. Acquire images. Finally, the desired pulse sequence is run and the images are produced. Hooray! Steps 6 through 8 are then repeated until all sequences in the protocol have been run.
9. Post-processing. Additional post-processing is required for a number of advanced sequences, including MR angiography, vascular and CSF flow studies, cardiac imaging, diffusion tensor imaging, functional MRI, and spectroscopy. This can be done on the main scanner console or on a separate workstation.
10. Data archiving. The images and processed data are stored on a PACS or other archival system. Raw data is often discarded.
Advanced Discussion (show/hide)»
No supplementary material yet. Check back soon!
References
Prince M. Learnmri.org, an illustrated workbook. (Contains pdfs of various protocols and steps for technologists, all based on a GE MR interface).
Prince M. Learnmri.org, an illustrated workbook. (Contains pdfs of various protocols and steps for technologists, all based on a GE MR interface).


